
We all want that slick, smooth, high quality stream when we hit that “start streaming” button however setting everything up can get overwhelming especially if you are at the beginning of your journey or like many others, you’re just not tech inclined and that’s ok, you just want to offer content you don’t want to waste days on end researching what settings work best for you, that’s why I’m here.
Let’s start with the obvious, if you’re using anything other than OBS or S.E. OBS (which is basically OBS with some addons) then this guide is NOT for you and I strongly encourage you to switch to OBS as it’s the most stable and resource friendly streaming software many people use.
With that out of the way let’s begin our lesson… Right off the bat you won’t be able to beef up your OBS settings without having a grasp of what you’re working with. We all have different rigs, different internet speeds not to mention, different preferences when it comes to defining what a “quality” stream is. So before jumping into configuring OBS the most important thing is finding out what upload speed you have.
In order to understand why upload speed is important you need to understand how streaming on twitch works.
Your ingest bitrate is the amount of data you send to Twitch when you stream. A higher bitrate takes up more of your available internet bandwidth. If your bitrate is too low for the resolution and framerate settings you’ve selected, you may find that your image quality suffers. Conversely, too high a bitrate may cause issues with buffering or dropped frames for your viewers, or with your own bandwidth.
I will share with you some recommended bitrate settings however before we do that let’s see where we can safely find out what our upload speed is and how to calculate our perfect bitrate.
For the upload speed you can access this website I’ve been using them for years and I am more than happy with the results. And last but not least you’ll also want to calculate your bitrate be sure to fill in accurate information in the calculator if you want good results.
As promised next up I will be sharing some recommended settings that should cover everyone’s needs and preferences. Let’s start by dividing it into two encoding categories, some streamers use NVIDIA NVENC ( myself included ) and others use x264 encoding.
NVIDIA NVENC
x264
1080p 60fps
High Quality, slow motion content
Resolution: 1920×1080
Bitrate: 6000 kbps
Rate Control: CBR
Framerate: 60 or 50 fps
Keyframe Interval: 2 seconds
Preset: Quality
B-frames: 2
1080p 60fps
High Quality, slow motion content
Resolution: 1920×1080
Bitrate: 6000 kbps
Rate Control: CBR
Framerate: 60 or 50 fps
Keyframe Interval: 2 seconds
Preset: veryfast <-> medium
Profile: Main/High
900p 60fps
Fast paced games (i.e. Battle Royale, Shooters)
Resolution: 1920×1080
Bitrate: 6000 kbps
Rate Control: CBR
Framerate: 60 or 50 fps
Keyframe Interval: 2 seconds
Preset: Quality
B-frames: 2
900p 60fps
Fast paced games (i.e. Battle Royale, Shooters)
Resolution: 1920×1080
Bitrate: 6000 kbps
Rate Control: CBR
Framerate: 60 or 50 fps
Keyframe Interval: 2 seconds
Preset: veryfast <-> medium
Profile: Main/High
720p 60fps
Resolution: 1280×720
Bitrate: 4500 kbps
Rate Control: CBR
Framerate: 60 or 50 fps
Keyframe Interval: 2 seconds
Preset: Quality
B-frames: 2
720p 60fps
Resolution: 1280×720
Bitrate: 4500 kbps
Rate Control: CBR
Framerate: 60 or 50 fps
Keyframe Interval: 2 seconds
Preset: veryfast <-> medium
Profile: Main/High
720p 30fps
Resolution: 1280×720
Bitrate: 3000kbps
Rate Control: CBR
Framerate: 30 fps
Keyframe Interval: 2 seconds
Preset: Quality
B-frames: 2
720p 30fps
Resolution: 1280×720
Bitrate: 3000kbps
Rate Control: CBR
Framerate: 30 fps
Keyframe Interval: 2 seconds
Preset: veryfast <-> medium
Profile: Main/High
Audio
Codec: AAC-LC. Stereo or Mono
Recommended Audio Bitrate: 128kbps
Maximum Audio Bitrate: 320 kbps (AAC)
Sampling frequency: Any (AAC)
Audio
Codec: AAC-LC. Stereo or Mono
Recommended Audio Bitrate: 128kbps
Maximum Audio Bitrate: 320 kbps (AAC)
Sampling frequency: Any (AAC)
Please keep in mind these are just ‘recommended’ settings by twitch, you should not take them to heart, it only helps figuring out what settings you sort of need to aim for depending on what sort of games you play, be it a slower game or a super dynamic action game.
Now…as useful as theory is, applied practice is much more fun, so let’s get started on some basics.
When you go into your OBS settings you will be greeted by a menu that should look something like this:
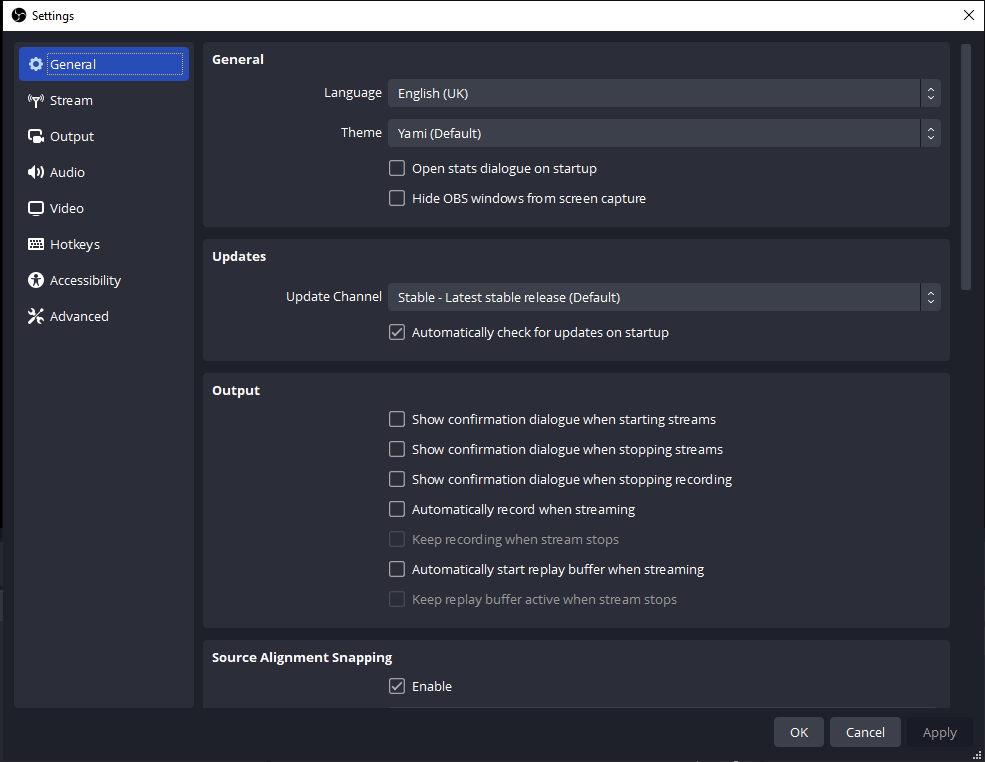
I’m only going to cover what matters, in the future if you guys find this sort of guides helpful I will make more in depth ones however for now let’s go through the essentials to get that crisp image we all want.
In the next image you’ll see are my personal settings, I will go through everything so you can make an idea of what you need depending on your setup.
Probably the most important settings you can make are in the Output tab, once you open that you will have the Output Mode ( it’s highlighted in green in the picture below ) which by default will be set to “simple” you’ll want to click on the dropdown there and switch to advanced.
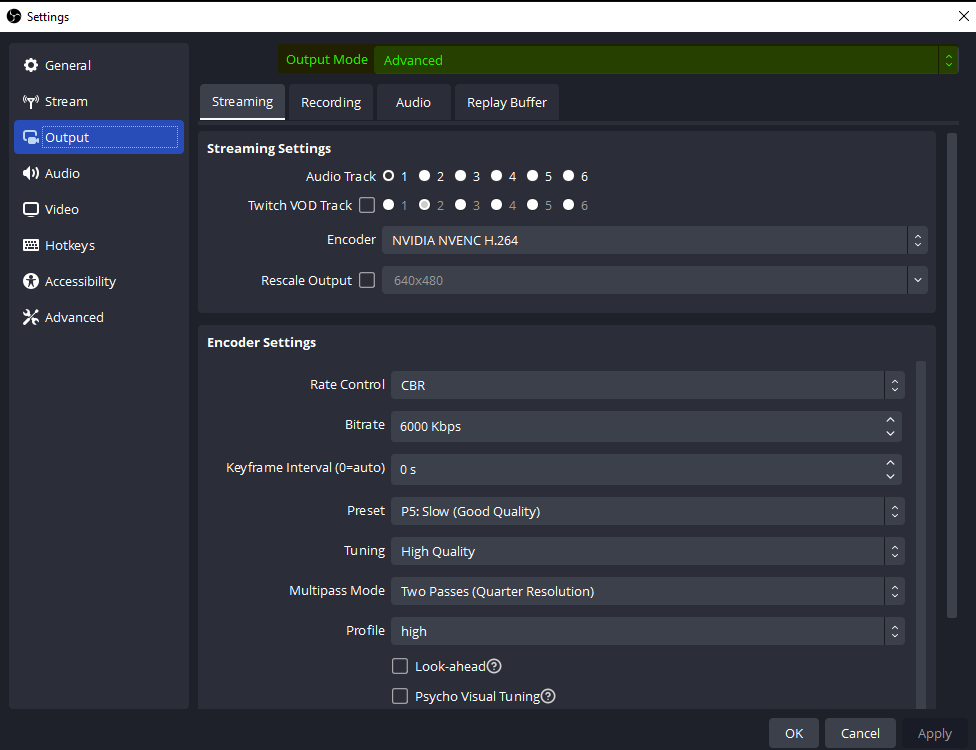
There’s a few things I’d like to go through here.
The Encoder option, if you have a beefy graphic card then I strongly suggest you go with the NVIDIA NVENC H.264 encoder, if your GPU is a bit outdated you may want to test out how x264 works, assuming your CPU is decent.
On the “Encoder Settings” submenu I universally suggest you use CBR as rate control, we already learned how to calculate our needed bitrate so I will only give you some extra info here. Keep in mind that twitch only allows a maximum of 6000 Kbps, there is no reason to go any higher even if you have good upload unless you’re a twitch partner, then it would be a maximum of 8000 Kbps, there is a way to bypass the limit and get partner level quality but that’s a different guide.
The preset should be played around with and select what works best for you, by all means if you have a beast of a rig use P7 for highest quality, I found my sweet spot at a P5: Slow ( Good Quality ).
Tuning is the exact same story as the preset profile, you go High Quality or Low Latency, you want low latency if you’re upload speed is not that great.
There are two more options that don’t show in the screenshot but you will see them if you scroll a bit down through the menu, that would be the GPU and Max B-frames, which I personally have set GPU to 0 and the Max B-frames are set to 2.
We’re almost done, the last thing I want to talk about are the “Advanced” settings from the left side menu.
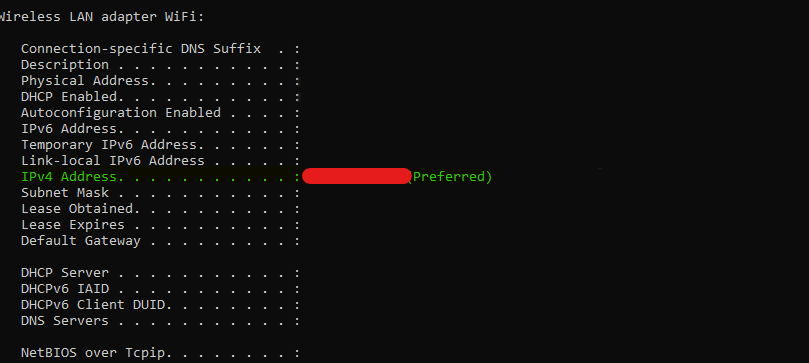
You’ll want to go there, under the network profile and be sure to have your IP selected at the “Bind to IP” dropdown, also make sure you are using the correct IP by opening a command prompt on your computer and use the command line “ipconfig /all”.
Next you want to make sure that you have a check mark on “Dynamically change bitrate to manage congestion” and on “Enable network optimizations” , we don’t really care about TCP pacing.
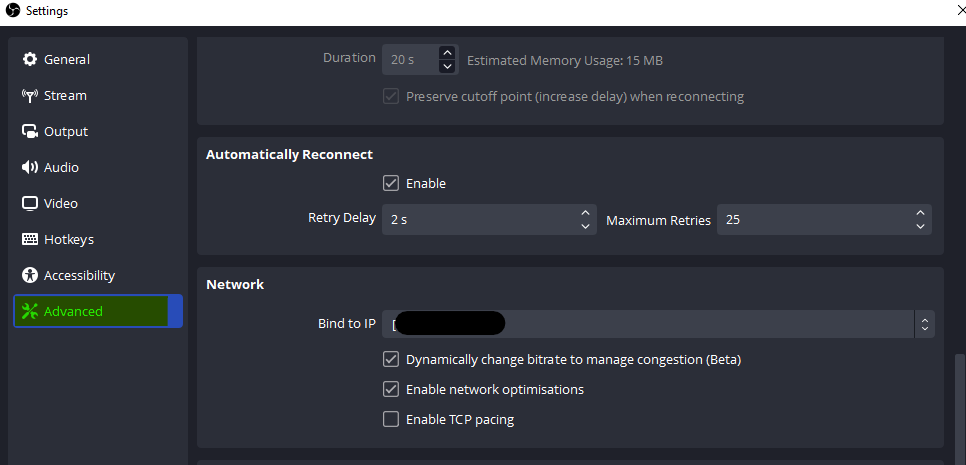
And we are finally at the last part, in order to find the correct IP in the command prompt, you’ll want to look for the IPv4 Address highlighted in green.
We reached the end and I genuinely hope this helped you out even a little bit.
Until next time guys!